Showing posts with label SDW. Show all posts

Wednesday, November 19, 2008

Sock Design Workshop, part 2

Or, A Word on the Importance of Blocking. I know what you're thinking, but please keep reading anyway.

This is part two of a monthly series in which I try to share bits of knowledge I've learned over the last few years as a new designer. Not always about socks, but it is so named anyway.

Part one discussed the submission process. Today I'll talk about something that is critical to the process, but not so glamorous.

Blocking!

Why:
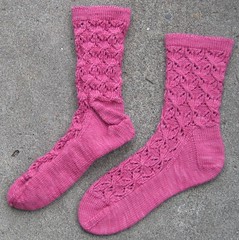
Unblocked Esther socks

One looks pretty. One looks like dog business. The difference? Blocking. If you are submitting as a designer, you absolutely cannot skip this step, even for swatches. If you are knitting for fun, I hope you'll consider blocking your knits too. At least for the show and tell photo.

You probably know this, but blocking means shaping a wet finished knitted piece to achieve certain results, like altering the measurements, evening out stitches, and opening up lace.

Something I learned the hard way is that lace looks terrible until it is blocked. Not just mine, but everyone's. Always.

There are many methods of blocking, I'll mention a few of them here.

How:

1. Wet blocking. This is almost always the method I use. It's simple and effective. Fill up the sink with water and some gentle wool wash. Squeeze the air bubbles out of your knitted item very gently and let it soak for a few minutes. Drain the sink and gently squeeze the water out of your knitting. Do not rinse. Lay it out on a towel and roll it up, drawing the water out of your knitted object. Finally, lay it out on a dry towel and pin it in place. Or use a blocking tool, as described below.

2. Steam blocking. I've done it, but not often. I find it fussy because it involves an iron or steamer, two items rarely making an appearance in my home. This is a good method for fibers that are delicate or stretch out a lot. Also, it's for you if you are the kind of person who has an iron handy. Congratulations, by the way.

Lay a wet towel on top of your knitting and press it here and there, releasing steam into your object. You can also skip the wet towel and hit the steam button (or use a steamer) over your knitting. When done, pin and let air dry.

3. Spray blocking. I've used this technique with delicate yarns or when the finished piece looks pretty good without any blocking at all. It's quick and easy. Pin the piece in place and spray until damp. Leave it alone until it's dry.

Tools:

1. Rust-proof pins. Avoiding rusty stains on your knitting just makes sense.

2. Blocking wires. These are great for large lace projects. You thread thin wires through the edges of your knitting, instead of 10,000 pins.

3. Sock blockers. I use these constantly. I bought them here. You can also make your own. I wash finished socks and put them on the blockers and basically forget about them for a couple of days. Easy.

In Conclusion:

Yes, blocking makes a huge difference in your finished object. It also says something about you as a knitter. That you care enough about your work to make it the best it can be. You've already invested time and money into the project, why stop short on the final step?

If you are reading this, then you've actually made it to end of a lecture on blocking. Well done! You get extra points for sticking it out. You will undoubtedly have the last laugh when you show off your next properly blocked finished object. Ha!

Sunday, October 05, 2008

Sock Design Workshop, part 1

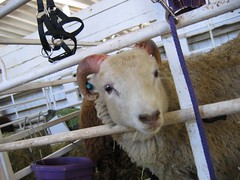
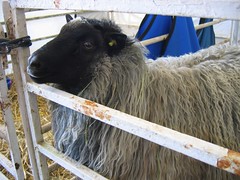
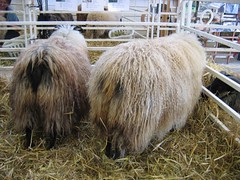
Oh my friends, here we are again, in this place where I can't discuss most of my knitting. BUT I can share a few pictures from the recent OFFF, (Oregon Flock and Fiber Fest) which was a blast!

OFFF

Today is the first installment in the Sock Design Workshop series, in which I try to share bits of knowledge I've learned over the last few years as a new designer. Not always about socks, but it is so named anyway.

I'm not starting in an obvious place. Why? I am busy these days working on a book proposal and I'm learning a LOT. The main thing I try to keep in mind for this current project is the same thing I consider when submitting patterns anywhere, so it is the perfect place to start, actually.

Take a sec to see another fluffy fiber friend.

OFFF

Okay, good. Let's talk about the submission process. Yes, we'll talk about yarn, construction, design, concepts, pattern writing, etc. but not today. The process can be challenging, but like anything else, it will get easier with practice.

In General:

I am going to suggest to you that you treat a design submission the way you would treat a job interview. Take it very seriously, and do exactly what you're supposed to do. Don't send anything that you're not happy with, is incomplete, done poorly, or you feel you won't be able to pull it off.

Magazines usually post on their website their criteria for submissions. For some, it's through email, and others require physically sending in proposals with swatches. Read through the criteria several times and make sure you follow it to the letter.

Where to Submit:

At this point I have to assume you're already on Ravelry, if not, get thee to the Ravelry asap. There are often calls for submissions posted in the Designers group. Go to the forums and search "call for submissions" and see what pops up. Also look up the websites for Interweave Knits, Knitscene, Vogue Knitting, knitty, (etc. etc. etc.) and check out their submission guidelines. Yarn companies are often looking for designs too.

Most places will want a proposal. There are exceptions, like knitty. They will want pretty pictures of the completed item along with the pattern and a few other materials as well.

Really consider where you are submitting when you design. What is their target audience and skill level? Your design should fit their established style and the appropriate season.

A word about photos:

Take the time to do this right. I am always reading about how "my camera doesn't seem to want to take a good picture" or some other nonsense. At the risk of sounding like a jerk, it's more likely to be user errors. (shock) Sorry, it had to be said. To be fair, there are low quality cameras out there, and if you have one, you'll probably want to start saving for a decent digital camera if you're serious about being a designer. There are no acceptable excuses when submitting poor photos to a magazine, you'll simply be rejected.

A few basic tips: (please do more research on this subject, this is very basic)

1. Never ever ever use the flash, unless you are a pro. Go outside or use a good window or if you are really into it, you can build a light box. I just go outside.

2. Avoid direct sun, dark shadows, early morning and dusk. These things will mess with your color. Cloudy days are great. Overcast sky makes for great color, but depending on what you're shooting, the result could look flat.

3. Take 25 more pictures than you think you'll need. At least. You can delete them later. It's way easier to pick the best 3 out of 50 than it is to send only one because they all look bad.

4. Focus. Your knitting has to be in focus for submission. This is not the time to be overly creative in this area.

5. Composition. Give yourself multiple options. Avoid cliches like leaning on a tree. Do you have garbage in the background? Look really hard.

6. Edit. Crop and color enhance as needed. Learn how to do this.

7. Save copies of the photos you want to use and re-name them appropriately. For example, "Quant right side" - The more organized you are, the better you will help an overwhelmed editor.

8. Use models, dress forms, sock blockers, any tools you can to get the best picture.

I'm sure I'm forgetting something but this is a good start. The main thing is to take your time and do it right. If you are a pro, these tips will seem ridiculous to you. If you needed them, I hope they help! Now, let's take a break and look at some more woolies.

OFFF

Swatches:

Your swatch should be in your intended yarn. You can't send a chunky white wool and say, here is the cable pattern but imagine it in a lace weight red silk..." I can't believe I am saying this but you also have to block your swatch. Your editor may completely change out your yarn, color, gauge, whatever, but that's much later in the process. I also suggest you use yarn that is easy to find in a typical yarn shop.

Your Design:

Only submit something you know how to accomplish. Do not sketch out something beyond your skill level or schedule limitations. Do not propose a body suit knit in mohair on US size 0 needles, unless you are very very adventurous and can roll with the consequences. In short, every single decision you make should be intentional.

We will talk more about yarn and designs later, in another blog post.

Before I forget, WRITE A GOOD COVER LETTER! Again, consider it a job interview.

In Conclusion:

Be professional and nice. Keep up good communication and make your deadlines. This is an extremely competitive field and you have to find a way to stand out. You don't want to get a reputation for being difficult, late, and sloppy. If it goes well, they'll remember that they liked working with you and will want to again.

If you get rejected, do not take it personally. It could be for any reason, and unless they tell you why, do not use your imagination to fill in the gaps. Trust me, no good will come from that. Ask me how I know! Your design might not have fit into the current issue, plain and simple. Some very good designs out there were initially rejected by someone and eventually published somewhere else. It's no big deal, really. Don't give up!

These are the basics of design submissions. I haven't even mentioned self publishing. Obviously I have more to say on the subject, but perhaps we can chat again later, as this post has gotten quite long. Good luck!