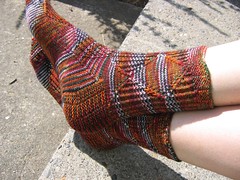
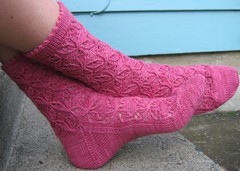
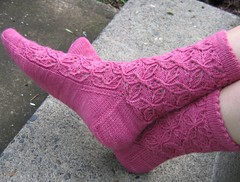
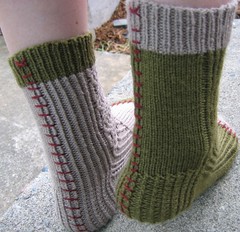
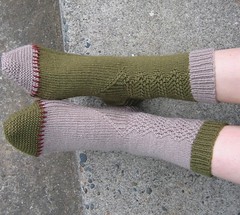
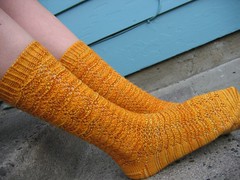
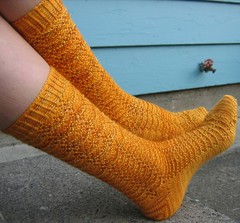
Remember the TRON socks I was teasing? Funny thing, the pattern is FINALLY READY for release. It's been tested and approved, ready to go.
Surprise!
I'm sure by now everyone knows about TRON, but just in case:
"A hacker is literally abducted into the world of a computer and forced to participate in gladiatorial games where his only chance of escape is with the help of a heroic security program." -IMDb
In 1982, this was very forward thinking. There was also a fantastic arcade game based on the film at the time that my brother used to play. Now there are socks, as well.
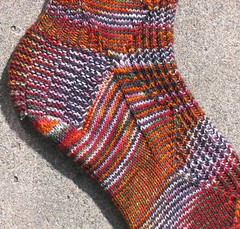
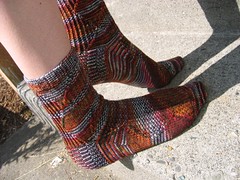
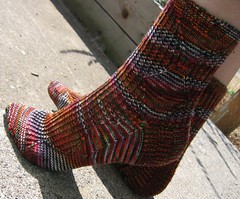
This project is intended to get you off the computer and into some knitting, but you’ll need to follow a crooked path to make your escape. Each sock zigzags around the leg and down the foot. The cuff and heel are worked in pixel-inspired garter blocks. You can work both socks the same, making them angle in unison, or you can work them in mirror image, your choice.
I'm sure I didn't invent this, but I'm happy to have hit upon this garter block stitch pattern (on heel and cuff) while playing around with the pixel concept. I think they look like they belong in an old video game. Am I nuts?
This 7-page pattern is $4.00...
buy now
A place for knitting and spinning and some other things too! Be sure to visit my website: http://starathena.com
Friday, December 26, 2008
Monday, December 15, 2008
Wine Bottle Accessories
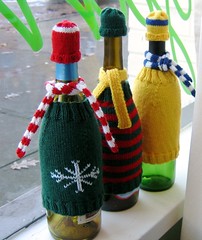
Yes, it's cold outside. Crazy cold. Time to knit a sweater for your wine bottles, naturally.
Hot off the presses, this new pattern includes instructions to knit sweaters, hats and scarves for your wine/champagne/cider bottles.
Also includes 3 charts: snowflake, tree and dreidel... for additional adornment.
Details: The Ravelry page is here. The only way to get this pattern is directly from Twisted Yarn shop in Portand, OR. If you're local, you can see about 7 or 8 of them in the shop right now.
Side note: when some empty wine bottles were needed to model these sweaters, magically a whole bunch appeared. Did you ever stop to think where all those bottles came from? Best not.
Wednesday, December 03, 2008
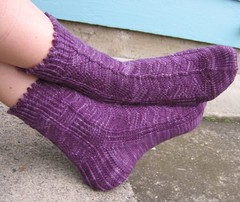
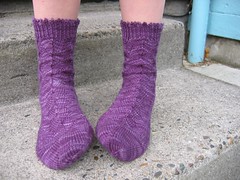
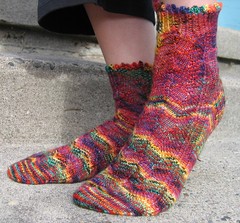
Water Cube Socks
Remember the TRON socks I was teasing? Funny thing, the pattern is not quite ready for release.
But the Water Cube Socks are! Surprise!
This project was inspired by the 2008 Beijing Summer Olympics and all of the action that happened in the Water Cube.
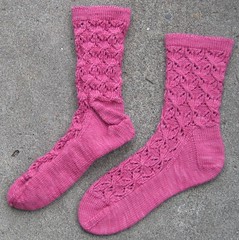
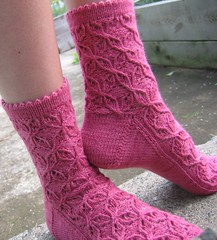
Each sock has a wavy lace motif and a strong center seam like a swimmer wiggling through the pool.
The cuff is worked with a picot edge for an added splash, and the sides alternate between ribbing and reverse-stockinette for a cube-like effect.
The star toe is like a spiral high dive.
The original pair was knit with Fresh From the Cauldron Yarns Superwash sock yarn in the colorway Pennywise.
The purple pair was made with a brand new sock yarn from Schaefer Yarns: Nichole. Both yarns are fantastic!
Don't fret TRON fans, though the movie sequel will be released in 2011, the sock pattern will be released before 2008 is over.
Just $4. Have fun with these socks and go for gold!
Thursday, November 27, 2008
Thanksgiving
Thank you for being here with me... for reading the blog and being cool.
THANK YOU
Originally uploaded by psd
Thanks for great friends and family.
Thank you, thank you
Originally uploaded by magnetbox
Thanks for a great day job and a great moonlighting job. Both involve knitting!
Thank You
Originally uploaded by Orin Optiglot
Thanks for a fantastic town I get to call home.
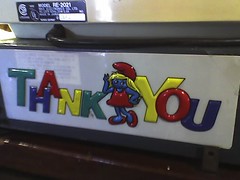
Smurfette says thank you
Originally uploaded by joebeone
Thanks for the challenges. (I'm supposed to feel that way, right?)
hey, thanks
Originally uploaded by jonathan.youngblood
And thanks for the ten thousand other things, great and small, that make up life in this moment. Oh yeah, and pie. Thanks for pie.
Wednesday, November 19, 2008
Sock Design Workshop, part 2
Or, A Word on the Importance of Blocking. I know what you're thinking, but please keep reading anyway.
This is part two of a monthly series in which I try to share bits of knowledge I've learned over the last few years as a new designer. Not always about socks, but it is so named anyway.
Part one discussed the submission process. Today I'll talk about something that is critical to the process, but not so glamorous.
Blocking!
Why:
One looks pretty. One looks like dog business. The difference? Blocking. If you are submitting as a designer, you absolutely cannot skip this step, even for swatches. If you are knitting for fun, I hope you'll consider blocking your knits too. At least for the show and tell photo.
You probably know this, but blocking means shaping a wet finished knitted piece to achieve certain results, like altering the measurements, evening out stitches, and opening up lace.
Something I learned the hard way is that lace looks terrible until it is blocked. Not just mine, but everyone's. Always.
There are many methods of blocking, I'll mention a few of them here.
How:
1. Wet blocking. This is almost always the method I use. It's simple and effective. Fill up the sink with water and some gentle wool wash. Squeeze the air bubbles out of your knitted item very gently and let it soak for a few minutes. Drain the sink and gently squeeze the water out of your knitting. Do not rinse. Lay it out on a towel and roll it up, drawing the water out of your knitted object. Finally, lay it out on a dry towel and pin it in place. Or use a blocking tool, as described below.
2. Steam blocking. I've done it, but not often. I find it fussy because it involves an iron or steamer, two items rarely making an appearance in my home. This is a good method for fibers that are delicate or stretch out a lot. Also, it's for you if you are the kind of person who has an iron handy. Congratulations, by the way.
Lay a wet towel on top of your knitting and press it here and there, releasing steam into your object. You can also skip the wet towel and hit the steam button (or use a steamer) over your knitting. When done, pin and let air dry.
3. Spray blocking. I've used this technique with delicate yarns or when the finished piece looks pretty good without any blocking at all. It's quick and easy. Pin the piece in place and spray until damp. Leave it alone until it's dry.
Tools:
1. Rust-proof pins. Avoiding rusty stains on your knitting just makes sense.
2. Blocking wires. These are great for large lace projects. You thread thin wires through the edges of your knitting, instead of 10,000 pins.
3. Sock blockers. I use these constantly. I bought them here. You can also make your own. I wash finished socks and put them on the blockers and basically forget about them for a couple of days. Easy.
In Conclusion:
Yes, blocking makes a huge difference in your finished object. It also says something about you as a knitter. That you care enough about your work to make it the best it can be. You've already invested time and money into the project, why stop short on the final step?
If you are reading this, then you've actually made it to end of a lecture on blocking. Well done! You get extra points for sticking it out. You will undoubtedly have the last laugh when you show off your next properly blocked finished object. Ha!
Tuesday, November 11, 2008
Esther Socks
Grey skies, pink sockens.
Pattern: Esther Socks by Stephanie van der Linden (Found on Ravelry)
Yarn: Hill Country Yarns Sweet Feet Color: Vermilion.
Needles: Hiya Hiya Stainless Steel 32" circular (magic loop), US size 1 (2.25mm)
Pattern Review: Esther was designed for the Socken-Kreativ-Liste, a German yahoo-KAL with 2000 members. The English version includes some amusing translations.
The picot edge is referred to as "mouse teeth edging" which is at once really cute and a little horrifying.
This is my first picot cuff of this kind and I'm glad I've finally done it. It doesn't quite do what ribbing does, but it stays up well enough and matches the design on the sock pretty well. I still think of them as mouse teeth edging. I'm trying hard not to, actually.
I'll mention that the chart uses non-conventional symbols, which wasn't a problem at all. I used colored pencils to highlight the different stitches and I kept my place easily.
Modifications: Not much to speak of. I reduced the gusset in a more traditional way. I reversed the cables on the second sock for a mirrored effect.
Yarn Review: Well, the color is named vermilion and yet it is clearly pink. I'm not really into pink, but I think these came out pretty well.
Overall: Fun to make, cute to wear. I enjoyed the non-traditional pattern style as well. I found it refreshing. Others may find it frustrating. Bear it in mind if you think you want to make them.
Hey! I've knitted myself some pink socks! From a German pattern! During October! Now where are the pretzels and beer already?
Thursday, November 06, 2008
Yes we can
No matter what your personal politics, no one can deny the importance of the last few days in regards to our history as well as for our future.
This is really big. But, just saying it's really big makes it sound small somehow.
I don't know how to express all of the emotions I'm feeling these days. It's common for many of us to express ourselves through what we make. I spent a little time over on flickr and saw that many people found creative ways to express themselves.
They say a picture is worth 1000 words, so here is a long story about how we feel and how crafty we all are.
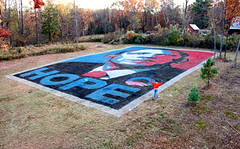
Pennsylvania has HOPE
Originally uploaded by a35mmlife
felt ball of hope 08
Originally uploaded by feltcafe
Obama-rama!
Originally uploaded by iwriteplays
Obama Knitter Girl
Originally uploaded by fyberduck
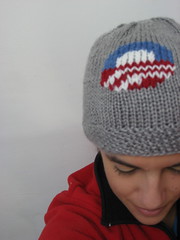
when knitting and politics collide
Originally uploaded by zannamarie
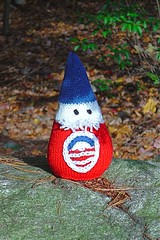
Obama Gnome
Originally uploaded by katywhumpus
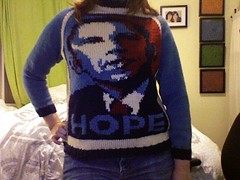
Yes we can... take a nap in our new Obama sweater
Originally uploaded by unertlkm
Monday, November 03, 2008
Yay! You voted! High Five! Here's a PDF for you!
flared hat
Originally uploaded by -leethal-My pal Lee is giving away an awesome fun-packed FREE PDF to people who vote.
You get:
- a knit pattern for the flared hat pictured (I plan on making one asap)
- a dandelion stencil
- an alpaca aplique design
- a thank you card to print out
- mac and cheese recipes and more from Pete
What are you waiting for!? Go get it now! HERE
Saturday, November 01, 2008
All of my projects are in trouble
Do you ever over think EVERYTHING? Yes, I'm looking at you. I'm obsessed with my struggling projects. Foolishly so. I'm hoping a public airing will help. Let's see.
1. A new sock project I'm designing for a secret something in the future. They're in the prototype phase and don't have to be perfect yet. They should be fun and cute enough to keep me working on them though.
- Why am I working the stitch pattern upside down? I discover this factoid around the time I get to the heel. I keep going because I want to experiment with a "new" and "interesting" heel technique. Which leads me to...
- Why is the heel large enough to fit Babaar? Seriously. Normal leg, normal ankle, giant bulbous sack of a heel. But, you know, naturally I keep going. Until... SNAP!
- Why did I break a needle working the lace? No biggie. Nothing $8 couldn't fix. But I'm starting to feel like this sock just doesn't want to exist. I almost hear a tiny voice begging me to pull the plug... and pull and pull and pull.
- Why am I stubborn and not ripping it out already? Ah, the real question. Sounds deep. Quick, let's talk about something else:
2. I thought it might be fun to do thick, DK-weight socks in an easy pattern as a mindless project. You know, to get my mind off the giant-heeled socks.
- Why is it so terribly ugly? Or is it? I think it is. I'll need to stare at it for a long time tomorrow. I may change my mind. I mean, I will change my mind. But then again...
- Why can't I decide to persevere or rip? Indecisiveness and stubbornness (again?) I suppose. Oh dear. Let's move on...
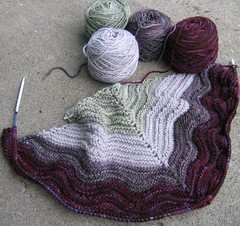
3. The Feather and Fan Comfort Shawl. It's lovely, the Malabrigo yarn is lovely, and the colors are great. That's one way to describe it.
The other way, is that I am now at the part where each row has a kazillion stitches so I can't do "just one more row" unless I know I can commit the time. While I work the row, I am wondering when to change colors next and which color to pick. And this is really dumb, but I'm caught up on the fact that I only chose 4 colors.
4 is not a Fibonacci number and therefore will not look as beautiful as it could... or some such nonsense. These are my thoughts as I work the shawl. Scary silly.
The shawl, earlier in the process:
4. This is the big one. You know what it is, because it is haunting you as well: Christmas Knitting. I have some ideas, but it's not working out. At all. Not yet, at least.
Are you still with me? Thank you for allowing the ridiculous self indulgence. I know I'll get my mojo back soon, honest. It's just when the thing you do to relax goes wrong, the world feels funny.
Apologies to everyone with Real Problems. I'll leave you with a helpful quote from the beloved Wollmeise herself,
"It's just yarn, people."
Thursday, October 23, 2008
Frankensocks!
Let's party!!!
This is very exciting for me... I have a pattern in the new knitty - surprise!
FRANKENSOCKS
Yes they are socks inspired by Frankenstein. What of it?
By the way, I think these socks would look pretty cool done in just one color, sans stitching. So they don't have to be crazy.
This is very exciting for me... I have a pattern in the new knitty - surprise!
FRANKENSOCKS
Yes they are socks inspired by Frankenstein. What of it?
By the way, I think these socks would look pretty cool done in just one color, sans stitching. So they don't have to be crazy.
Wednesday, October 22, 2008
Tuesday, October 21, 2008
Cloth Paper Scissors Studios
Today I report that pictures of my "studio" have appeared in a magazine:
Cloth Paper Scissors Studios Fall/Winter 2008, published by Interweave Press.
The magazine features inspiration and ideas for your art and craft space. Which is funny since I don't technically have an art and craft space. I do have a living room and calling it a craft space sort of makes it so.
Joking aside, it's pretty neat to appear in this magazine and I'm thankful for the opportunity, naturally.
I was interviewed for Studios about my "studio", but due to space issues most of the pictures didn't make it in there, making my descriptions somewhat pointless. So I present to you now the full article, as I would have done it, had the magazine been called Star Athena's Studio.
star athena
PORTLAND, OR.
What I do: Knitting and spinning
I used a recent move as an opportunity to redesign my workspace. I’ve come to Portland in search of the Good Life, and for me, that includes being creative every day. But my studio area doubles as my living space, so it must be organized. As a knitter, spinner, and lover of all things fiber, I found myself craving a balance of inspiration and usefulness.
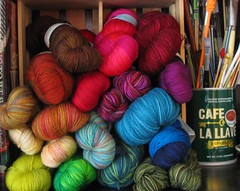
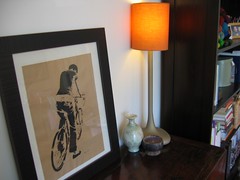
I started with a large bookshelf and filled it with items that inspire me. Old coffee cans hold needles and brushes. A CD crate turned sideways holds a rainbow of sock yarn. I decorated the space with a screen-printed picture of a girl on a bike I bought from an artist on the streets of Lower Manhattan. . I love the moment it depicts – foot on pedal, about to push off and have an adventure. Inspiration? Check. Usefulness? Check. Organized? Of course.
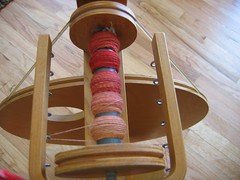
In front of the shelf I put a unique wooden chair. I like to sit here and spin on my vintage Louet S10 wheel. My mom made the pillow by hand.
I spend many hours here in the month of July spinning yarn while watching the Tour de France on TV.
Across the room is another cabinet with magazines, books on natural plant dying, pens, rulers, and a portable record player. Yes, I still play vinyl records and I love them.
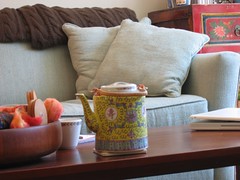
My favorite new element in this workspace is the couch. It’s perfect! I love the shape, fabric, color, and overall cuteness factor. I like to stretch out here with a cup of tea and knit for hours. Sometimes I sit up late, sketching new patterns with a pencil in a simple spiral-bound lined notebook.
I think the couch is fitting as the center of my workspace because it was made locally in Portland. I love the quality of life here and how people are active in making their own surroundings better. This couch represents my new life as creative pursuits take center stage in my journey.
Friday, October 17, 2008
Marigold Socks
As the weather starts to turn, the socks get a bit taller and brighter.
Pattern: Marigold Socks by Pamela Wynne
Yarn: Life in Lilt Creations Twist! Color: Sunny Days. Bought here.
Needles: Knitpicks Harmony 32" circular (magic loop), US size 1 and 1.5 (2.25mm, 2.5mm)
Pattern Review: I love patterns that are simple to knit but with results that appear more complicated than they really are.
These socks are worked from the toe up with a short-row heel, which I haven't done in a while but still enjoy. I basically followed the pattern as written, with a few changes I'll mention in a sec. The pattern is a variation on feather and fan, a well-known stitch that is very easy to do.
Modifications: I've got a few. I used "Judy’s magic cast on" because I've wanted to try it for a while now and don't do very many toe-up socks. I really like this cast on overall and far prefer it to the figure-8. No contest.
I also made the sock taller. I didn't want to alter the look of the pattern so I dealt with this by going up one needle size when it started to get snug. I hardly know if I'm supposed to mention this modification anymore since almost all of the socks I make for myself are taller.
I used the larger needle over the heel/ankle section as well to make them easier to get on and off. The short-row heel can be tight on the instep, depending on your ankle. I have narrow ankles but a high arch. A short-row heel with a larger needle worked perfectly.
I switched back to the smaller needle for the cuff and they do stay on well. I used Elizabeth Zimmermann's sewn bind off for the stretchy factor.
Yarn Review: The color is very cheerful, love love love. Jess at Life in Lilt custom dyed the yarn for me to make it extra orange. She is obviously a very talented indie dyer who really knows her stuff. You may want to check out her yarns before they get hard to find... The yarn is fantastic. Have you seen the heel?
Overall: Fun pattern, easy to follow, great results. Highly recommended. I'll love wearing them on a dark and cloudy day this winter, no doubt.
Friday, October 10, 2008
Summer is over
1. It's 42 degrees outside.
2. It's raining.
3. I am longing to knit blankets and sweaters.
4. The leaves are starting to turn.
5. Burgerville switched from walla walla onion rings to sweet potato fries
I think I speak for all of Portland when I say that the blackberry shakes are lovely, but we're ready for the pumpkin shakes now. Thank you.
Sunday, October 05, 2008
Sock Design Workshop, part 1
Oh my friends, here we are again, in this place where I can't discuss most of my knitting. BUT I can share a few pictures from the recent OFFF, (Oregon Flock and Fiber Fest) which was a blast!
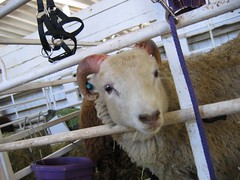
Today is the first installment in the Sock Design Workshop series, in which I try to share bits of knowledge I've learned over the last few years as a new designer. Not always about socks, but it is so named anyway.
I'm not starting in an obvious place. Why? I am busy these days working on a book proposal and I'm learning a LOT. The main thing I try to keep in mind for this current project is the same thing I consider when submitting patterns anywhere, so it is the perfect place to start, actually.
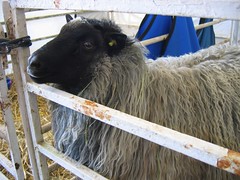
Take a sec to see another fluffy fiber friend.
Okay, good. Let's talk about the submission process. Yes, we'll talk about yarn, construction, design, concepts, pattern writing, etc. but not today. The process can be challenging, but like anything else, it will get easier with practice.
In General:
I am going to suggest to you that you treat a design submission the way you would treat a job interview. Take it very seriously, and do exactly what you're supposed to do. Don't send anything that you're not happy with, is incomplete, done poorly, or you feel you won't be able to pull it off.
Magazines usually post on their website their criteria for submissions. For some, it's through email, and others require physically sending in proposals with swatches. Read through the criteria several times and make sure you follow it to the letter.
Where to Submit:
At this point I have to assume you're already on Ravelry, if not, get thee to the Ravelry asap. There are often calls for submissions posted in the Designers group. Go to the forums and search "call for submissions" and see what pops up. Also look up the websites for Interweave Knits, Knitscene, Vogue Knitting, knitty, (etc. etc. etc.) and check out their submission guidelines. Yarn companies are often looking for designs too.
Most places will want a proposal. There are exceptions, like knitty. They will want pretty pictures of the completed item along with the pattern and a few other materials as well.
Really consider where you are submitting when you design. What is their target audience and skill level? Your design should fit their established style and the appropriate season.
A word about photos:
Take the time to do this right. I am always reading about how "my camera doesn't seem to want to take a good picture" or some other nonsense. At the risk of sounding like a jerk, it's more likely to be user errors. (shock) Sorry, it had to be said. To be fair, there are low quality cameras out there, and if you have one, you'll probably want to start saving for a decent digital camera if you're serious about being a designer. There are no acceptable excuses when submitting poor photos to a magazine, you'll simply be rejected.
A few basic tips: (please do more research on this subject, this is very basic)
1. Never ever ever use the flash, unless you are a pro. Go outside or use a good window or if you are really into it, you can build a light box. I just go outside.
2. Avoid direct sun, dark shadows, early morning and dusk. These things will mess with your color. Cloudy days are great. Overcast sky makes for great color, but depending on what you're shooting, the result could look flat.
3. Take 25 more pictures than you think you'll need. At least. You can delete them later. It's way easier to pick the best 3 out of 50 than it is to send only one because they all look bad.
4. Focus. Your knitting has to be in focus for submission. This is not the time to be overly creative in this area.
5. Composition. Give yourself multiple options. Avoid cliches like leaning on a tree. Do you have garbage in the background? Look really hard.
6. Edit. Crop and color enhance as needed. Learn how to do this.
7. Save copies of the photos you want to use and re-name them appropriately. For example, "Quant right side" - The more organized you are, the better you will help an overwhelmed editor.
8. Use models, dress forms, sock blockers, any tools you can to get the best picture.
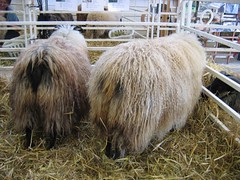
I'm sure I'm forgetting something but this is a good start. The main thing is to take your time and do it right. If you are a pro, these tips will seem ridiculous to you. If you needed them, I hope they help! Now, let's take a break and look at some more woolies.
Swatches:
Your swatch should be in your intended yarn. You can't send a chunky white wool and say, here is the cable pattern but imagine it in a lace weight red silk..." I can't believe I am saying this but you also have to block your swatch. Your editor may completely change out your yarn, color, gauge, whatever, but that's much later in the process. I also suggest you use yarn that is easy to find in a typical yarn shop.
Your Design:
Only submit something you know how to accomplish. Do not sketch out something beyond your skill level or schedule limitations. Do not propose a body suit knit in mohair on US size 0 needles, unless you are very very adventurous and can roll with the consequences. In short, every single decision you make should be intentional.
We will talk more about yarn and designs later, in another blog post.
Before I forget, WRITE A GOOD COVER LETTER! Again, consider it a job interview.
In Conclusion:
Be professional and nice. Keep up good communication and make your deadlines. This is an extremely competitive field and you have to find a way to stand out. You don't want to get a reputation for being difficult, late, and sloppy. If it goes well, they'll remember that they liked working with you and will want to again.
If you get rejected, do not take it personally. It could be for any reason, and unless they tell you why, do not use your imagination to fill in the gaps. Trust me, no good will come from that. Ask me how I know! Your design might not have fit into the current issue, plain and simple. Some very good designs out there were initially rejected by someone and eventually published somewhere else. It's no big deal, really. Don't give up!
These are the basics of design submissions. I haven't even mentioned self publishing. Obviously I have more to say on the subject, but perhaps we can chat again later, as this post has gotten quite long. Good luck!
Subscribe to:
Posts (Atom)